Wednesday, December 30, 2015
Christmas tree sensory play
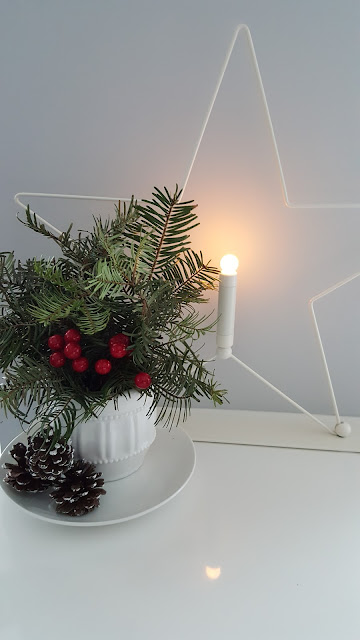
My girlfriend gave me some trimmings off her fresh Christmas tree to spruce up my outdoor planter. I had some left over so I decided to throw some in a pot and make a quick and easy Christmas arrangement. The little monster wanted to help so I thought, why not let her make her own. I threw some in her sensory table and let her go to town! Mmmmm nothing beats fresh pine scent!
Tuesday, December 29, 2015
Wine and Crafts
Wine and crafts night! Sounds like a jolly ol' time or some serious Pinterest fails in the making! Haha!
I had a couple gals over for an evening of wine and crafts. Most of which were more interested in wine than crafts, so I picked a pretty simple craft. So simple in fact that the next day the little monster made some as well... resulting in the same caliber end product. Which means this craft is pretty much suitable for anyone and any skill level!
We made some lovely snowflake ornaments out of wooden clothespins. Simple twist to take apart and glue them back together to form a snowflake and paint. We tied on some twine to hang as ornaments or they could be cute gift tags or even cute coasters.
And what's wine and crafts without munchies...
Monday, December 28, 2015
DIY Christmas tree basket
So as you all know, I got a ginormous Christmas tree last year which I am still in love with even though it is a bit of a pain to put up. I struggled to find a tree skirt to fit the very wide base/stand and ended up just wrapping a blanket throw around the base. What I really wanted was a metal tree collar or even a basket tree collar... but of course those did not exist in the size that I needed. So this year I vowed to DIY one up.
We had some chicken wire fencing laying around the garage (we used as temporary fencing for Kalbs before we got a real fence put up). I cut it to size... over 13 feet long... that's how beasty this tree base is! I used ribbon and weaved through the fencing for a woven basket look. I'm really pleased with the outcome as it gives the tree a completeness and it is definitely a step up from the blanket last year! Lol! The question know is how on earth am I going to store this thing? Haha!
We had some chicken wire fencing laying around the garage (we used as temporary fencing for Kalbs before we got a real fence put up). I cut it to size... over 13 feet long... that's how beasty this tree base is! I used ribbon and weaved through the fencing for a woven basket look. I'm really pleased with the outcome as it gives the tree a completeness and it is definitely a step up from the blanket last year! Lol! The question know is how on earth am I going to store this thing? Haha!
Sunday, December 27, 2015
Ice cream cone Christmas trees!
The monster and her cousins made Christmas tree treats as an easy alternative to gingerbread houses. I like it better for little kids because you do not have to worry about the damn house collapsing. Plus it is a great way to use up Halloween candy! I posted the pic to my FamJam chat and they voted to see which tree was the best. Apparently my family does not take into account age or creative licensing!! Haha can you guess which one Yules made...
Christmas cards!
These are the Christmas cards that the little monster made this year. I tried to think of something that was made mostly by her but that wasn't too special looking either... and most importantly EASY! Aside from me cutting the triangles (only because we were in a rush) Yules did everything herself. She glued on the tree, decorated with stickers and wrote her name on the back. Super easy card or art activity you can do with your monsters!
Saturday, December 26, 2015
B is for birch
So once upon a time there was this lady in one of my Facebook groups that meant to type birch but I guess it autocorrected to bitch. So her post looking for a birch cabinet was super vulgar and also super hilarious. Anyways, it's totally stuck and I use the word "birch" quite a bit now because I think it's sooooo funny!
Aside from birch being my new favorite word, I'm also quite obsessed with the actual tree. So much so that it was the first tree that I picked out for our backyard. Anyways, I got my hands on some birch branches for a couple diy decor things around the house.
1. Outdoor Christmas planter
It looks pretty much similar to last year with me sticking a bunch of stuff into our planter and calling it a day but a little bit better!! Last year I used fresh greens but this year the weather was unusually warm and I was a bit worried that it might look a little sad by Christmas since I had it up at the beginning of November. So I used mostly faux greenery to make sure it would look good all season. I actually used the bottom half of a 2 piece artificial Christmas tree as the base of my planter. (I used the top half of the tree as a mini Christmas tree for Yules). Sometimes I'm such a genius I surprise myself. Anyways, this made it super full at the bottom and made everything else I jammed in there way more stable. I added the birch branches for height and then regular twiggy tree branches for texture. I finished off with random dollarstore greenery and the sparkly picks from last year. I later added some real tree trimmings that a lovely friend cut off her fresh Christmas tree for me! I love love love how it turned out!
It looks pretty much similar to last year with me sticking a bunch of stuff into our planter and calling it a day but a little bit better!! Last year I used fresh greens but this year the weather was unusually warm and I was a bit worried that it might look a little sad by Christmas since I had it up at the beginning of November. So I used mostly faux greenery to make sure it would look good all season. I actually used the bottom half of a 2 piece artificial Christmas tree as the base of my planter. (I used the top half of the tree as a mini Christmas tree for Yules). Sometimes I'm such a genius I surprise myself. Anyways, this made it super full at the bottom and made everything else I jammed in there way more stable. I added the birch branches for height and then regular twiggy tree branches for texture. I finished off with random dollarstore greenery and the sparkly picks from last year. I later added some real tree trimmings that a lovely friend cut off her fresh Christmas tree for me! I love love love how it turned out!
2. Birch candles
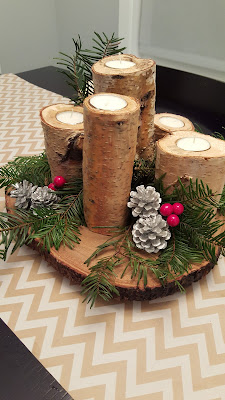
I had quite a bit of birch left over after I trimmed the pieces I needed for my planter so I had husband make me some candle holders. All you need to do is cut the birch to size and drill a hole for the tealight candle. I made 2 arrangements with the candles. The first one is simply just placed on top off a super cute wooden charger plate. I dressed it up with some Christmas tree greens, berries and acorns!
The second arrangement was a bit more work. I envisioned a super long and thin centerpiece, which Husband had to make for me! He built a simple 3 foot long wood box out of left over fence boards that we had laying around in the garage. We painted it in grey chalkpaint and then sanded it down a bit to give it a slightly distressed look. I know, I know... who the heck am I? Wood? Distressed? I don't blog for a few months and I'm like a different person! Lol Anyways, I filled the box with Christmas garland, candles, sparkly picks, ornaments and of course the birch candle holders. I am also in love with how this turned out! Not too shabby (literally) if I do say so myself!
So there you have it my "birches"... my diy birch projects!
Hello! It's me...
So it's obvious that I have given up on this blog! Boo! Insert sad emo face!
I was flipping through my abandoned blog and got a little Emo... okay a lot emo. There were so many moments and memories and projects that I had forgotten all about. I'm no spring chicken anymore and my memory is not what it used to be at all! I was reminded of how awesome it was to have this blog to document our crazy life and be able to look back and actually... remember!!!! Haha
So anyways, what I'm trying to say is that I'm going to try super hard to keep this blog going again. If not for the handful of you that have been borderline harassing me, then for myself!! Insert happy smiley face!!
So our gift to you this Holiday season is More us!
So anyways, what I'm trying to say is that I'm going to try super hard to keep this blog going again. If not for the handful of you that have been borderline harassing me, then for myself!! Insert happy smiley face!!
So our gift to you this Holiday season is More us!
Subscribe to:
Posts (Atom)


